Wall Greenery || Mini Wreaths
Welcome to my first DIY post! I'm kind of a DIY junkie. As long as I can remember one of my first thoughts after I saw something I liked was "Could I make that?" It was simply because I wanted to learn how to do something new and different.
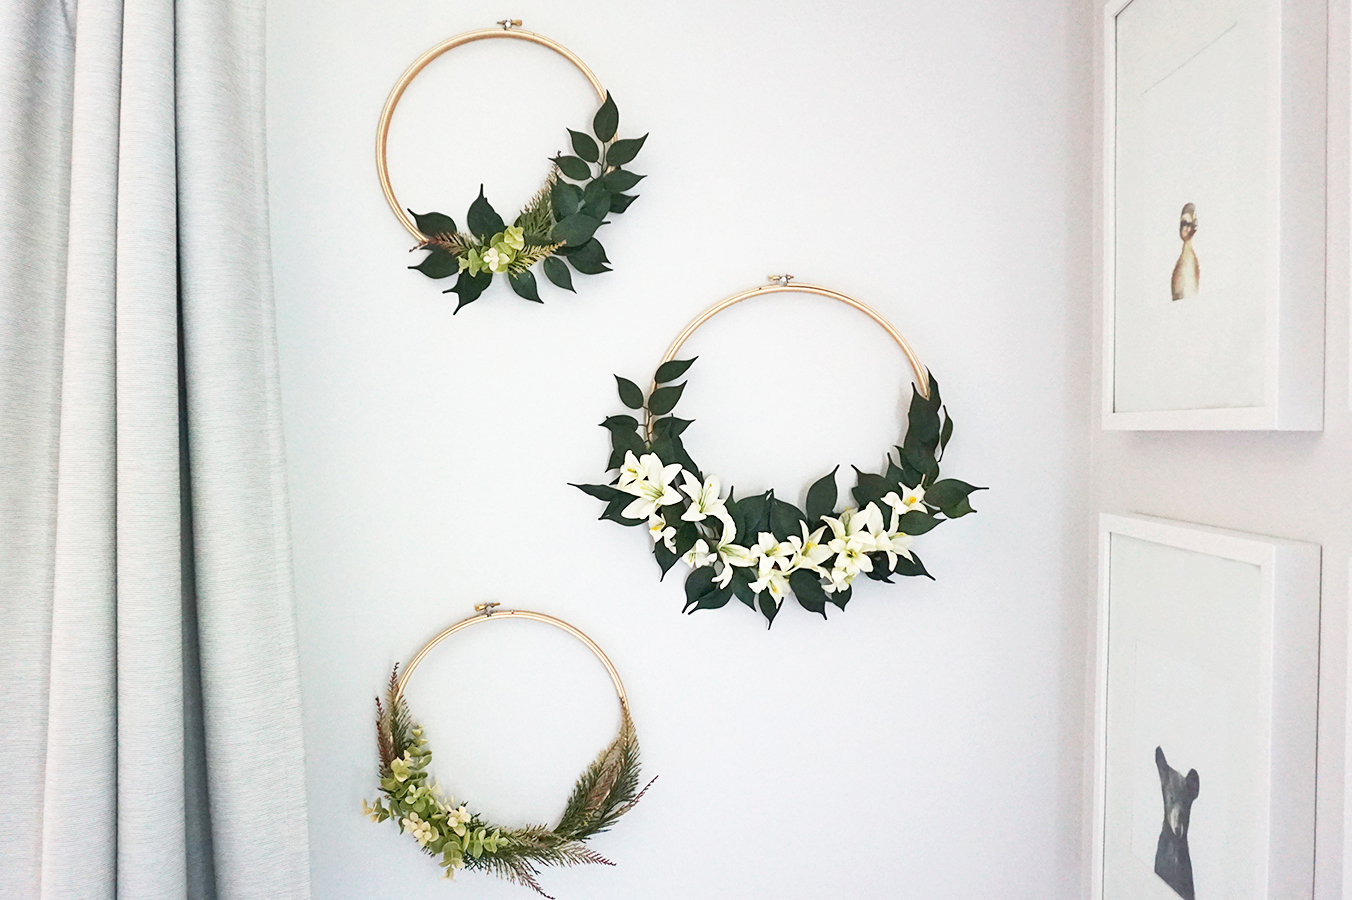
I saved a pin on Pinterest forever ago and these wreaths were in the shot. They had no description on where to find them so I figured I would make my own. I made these wreaths for my baby girl's room. I wanted to find a simple way to add a little greenery to the space. These mini wreaths are great because you can incorporate your own color scheme and favorite flowers/greenery.
After spending way too long at Hobby Lobby... which I always seem to do, I bought some leaves/white flowers. I wanted to keep the color scheme simple since the rest of the room is mostly grey and white. Plus, by using white flowers the green is able to have its moment in the sun... pun intended. :)

Wall Greenery | Mini wreaths -Designer Lip Service
In addition to some greenery and flowers, you will need some wooden embroidery hoops. These come in a few sizes so I used two medium and one larger to have a little contrast plus the silver/gold clasp adds a cute detail.Supplies needed:
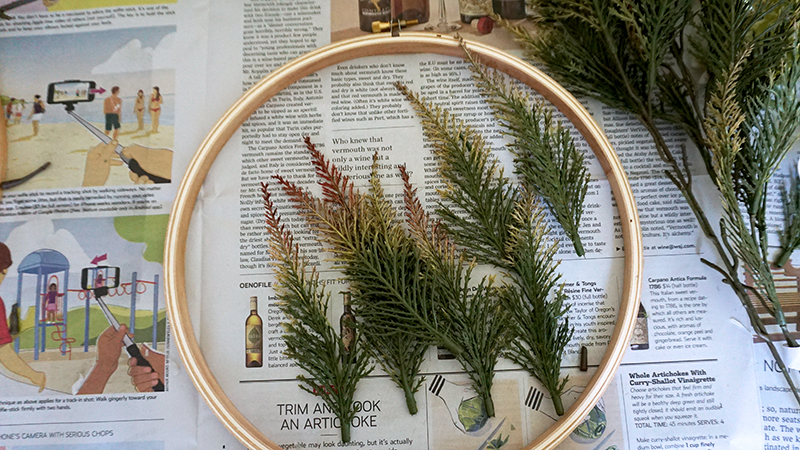
Greenery and flowers of your choice (I decided to use different textured leaves to add interest)
Wooden embroidery hoops (2 medium and 1 large)
Hot glue gun and glue sticks
Newspaper underneath workspace to make cleanup easy :)

Wall Greenery | Mini wreaths -Designer Lip Service

Wall Greenery | Mini wreaths -Designer Lip Service

Wall Greenery | Mini wreaths -Designer Lip Service

Wall Greenery | Mini wreaths -Designer Lip Service
DSC08464

Wall Greenery | Mini wreaths -Designer Lip Service
Wall Greenery | Mini wreaths -Designer Lip Service

Wall Greenery | Mini wreaths -Designer Lip Service

Wall Greenery | Mini wreaths -Designer Lip Service
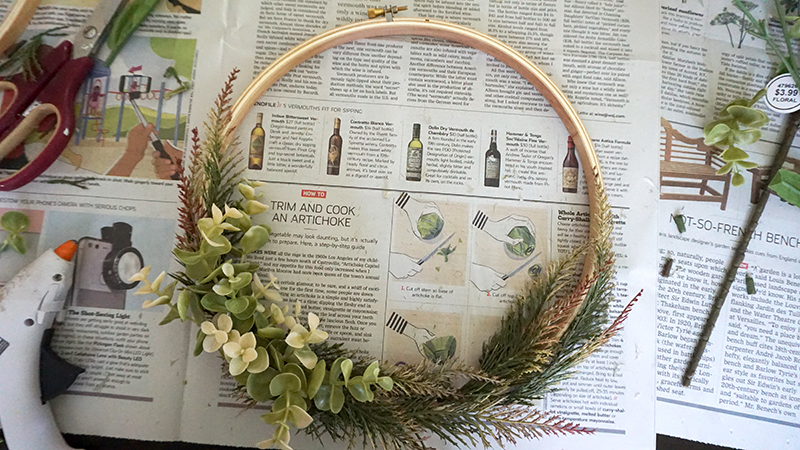
First I began to pull off the leaf branches off the larger stem. This will make it easier to glue on the hoops.Then I began to glue them on the hoops one stem at a time. I started gluing across the hoop from the metal clasp on the inside and worked my way outwards.It might look weird at first but just keep adding leaves on top and play with it to get the look you want. After you have some of the leaves going towards the right make sure you add a few going the opposite direction as well using your new leaves to cover where the stems are glued.Before you know it you are ready for the flowers... Pull them off the stem and glue them in clusters where the leaves change direction in center or off-center depending on your design. Just remember if you make it too heavy on one side it might lean when hung on the wall. Then do the same with the next wreath. Pull off stems and get gluing! I like that these leaves have more of a feathery texture to add some texture/contrast against the darker rounder leaves of the other wreath.I didn't want flowers on this one so instead I used contrast greenery till I filled the space. (Plus if you need to know how to trim/cook an artichoke see newspaper underneath ;)For the third wreath I wanted a marriage between the last two so that they would look like a set, so I used the three different types of greenery in one.And that's it! I used tiny brass nails in the wall and hung them underneath the clasp. You can arrange them different ways on the wall. (Clustered, in a row, or on top of one another) Either way it's a great way to add a little greenery that you never have to worry about watering.
All Supplies - Hobby Lobby (or any craft store)
Thank you for reading ! Xx
Save